GIMP Activity #0 (There are 2 options. Please scroll down and then choose.)
Option #1 <<<
|
Turn Mr. Rich into an Alien!
In this activity, we use the CLONE tool which is the hardest tool in The GIMP. Copy Image from WebFind a large-size image you want (not a thumbnail) then
|
|
Not sure how to do all this? Watch this video!
|
|
How to use the CLONE Tool
|
The CLONE tool takes multiple steps. If you get confused, please watch this video. Here's the steps:
|
|
- Then move your mouse to the area where you want to Paste.
- Then click-and-drag your mouse to do the paste.
You will notice that there are two circles moving when you click-and-drag:
- one circle in the pasting area
- and one circle in the copying area.
You will want to do lots of this, to clone parts of the photo from one place to another. In this video example, we CLONE an eyeball onto the forehead and also CLONE the mouth into the chin area. Super fun!
Not sure how to do this? Watch the video!
Change the Colours with the Hue-Saturation popup window (with sliders)
|
When you are ready to change colours, click on "COLOR" at the top of the GIMP window and choose the 4th option down, called HUE-SATURATION.
Then adjust the 3 sliders to get the effect you want. The 3 sliders are called: HUE, LIGHTNESS and SATURATION. Not sure how to do this? Watch the video. |
|
Option #2 <<<

First, let's take a look around the GIMP.
Ensure that you have watched (or are aware) of GIMP's new "Single Window Mode" and also the fixes for common interface issues.
Next, we want to create a new drawing and get used to the GIMP's interface.
Ensure that you have watched (or are aware) of GIMP's new "Single Window Mode" and also the fixes for common interface issues.
Next, we want to create a new drawing and get used to the GIMP's interface.
Steps

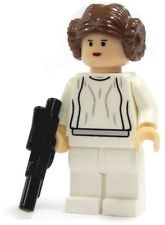
- Somewhere, find a cartoon image with a white background (example: Lego Princess Leia).
- Right-click -> Copy the image
- In the GIMP, File -> New
- Leave the defaults (640x480)
- Paste the image (Layers window -> "Floating Selection..."
- In the Layers window, click the "Create New Layer"
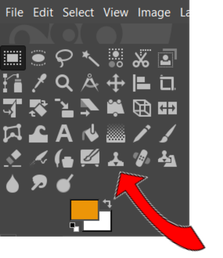
- Use the magic wand to select the whiteChoose a brush type and a color (blue)
- Make a scribble or lots of scribbles
- Rename the layer ("Blue")
- Repeat for 6 more layers (each different colors and brushes)
- Text [Your first name]
- Layers up/down so name partially covered


