Witty.ca - Mr. Rich's Professional Archives

  • Home
    • Lunch
    • Support
    • Intro
    • Cyber
    • Newest
  • Courses
    • Course Listing & Updates
    • DMS 2022-2023 >
      • Tech and Design Grade 6
      • Tech and Design Grade 7
      • Tech and Design Grade 8
    • -----------------------
    • DMS Archive 2021-2022 >
      • Tech and Design Grade 6 2021-22
      • Tech and Design Grade 7 2021-22
      • Tech and Design Grade 8 2021-22
    • HCS Archive 2015-2016 >
      • HCS'15 Media Studies 120
      • HCS'15 Nutrition for Healthy Living 120
      • HCS'15 Visual Art 9
      • HCS'16 Intro to Electronics 110 >
        • Purchasing a Computer in 2016 >
          • HCS'15 Visual Art 110/120
      • HCS'16 Housing & Design 120
      • HCS'16 Visual Arts 10
      • HCS Winter Decoration Ideas
    • HCS Archive 2014-2015 >
      • HCS'15 - Digital Production 12
      • HCS'15 - Graphic Art & Design 11
      • HCS'15 - Media Studies 12
      • HCS'15 - Visual Art 10
      • HCS'14 - BBT 10
      • HCS'14 - Info Tech 11/12
      • HCS'14 - Visual Art 9
      • HCS'14 - Visual Art 11/12
      • HCS Art Club
      • HCS Announcement Text
    • HCS Archive 2013-2014 >
      • HCS'14 - English 12
      • HCS'14 - Graphic Design 11
      • HCS'14 - Individual & Family Dynamics 12
      • HCS'14 - Info Tech 12
      • HCS'14 - Social Studies 8
    • Student Introduction Form
  • Tech Units
    • Safety & Citizenship >
      • Work Place Safety
      • Digital Safety & Citizenship
      • Digital Communication
      • Digital Rights & Responsibilities
      • Digital Etiquette
      • Digital Wellness
      • Digital Business
      • Digital Access
      • Digital Literacy
      • Digital Law
    • Scratch Coding >
      • Scratch Explained
      • Scratch 3 - Crossy Road 1
      • Scratch 3 - Crossy Road 2
      • Scratch 3 - Teacher Notes
      • OLD - Scratch 2 (Coding) >
        • Scratch 2 - Introduction to Coding
        • Scratch 2 - How to
        • Scratch 2 - Introduction
        • Scratch 2 - Frogger (p1)
        • Scratch 2 - Frogger (p2)
        • Scratch 2 - Frogger (p3)
        • Scratch 2 - Frogger (p4)
        • Scratch 2 - Frogger (p5)
        • Scratch 2 (Coding) >
          • Scratch 2 - A 2nd Project
          • Scratch 2 - Teacher Notes
          • Scratch 2 - Choosing another language
      • OLD - Scratch 1 (Coding) >
        • Scratch 1 (Coding)
        • Scratch (Scripts 1 & 2)
        • Scratch (Script 3)
        • Scratch (Frogger)
        • Scratch (Frogger 2)
        • Scratch (Frogger 3)
        • Scratch (Frogger 4)
        • Scratch Mini-Challenge 1
        • Scratch Final Project
        • Notes for Teachers >
          • Teaching Scratch
    • Graphic Design with Inkscape >
      • Graphic Design Overview
      • Inkscape Act.1
      • Inkscape Act.2
      • Inkscape Act.3
      • Inkscape Act.4
      • Inkscape Act.5
      • Inkscape Act.6
      • Inkscape Bonus Challenge
    • Photoshop with The GIMP >
      • GIMP Overview
      • GIMP Install & Setup
      • GIMP Activity 0
      • GIMP Activity 1
      • GIMP Activity 3
      • GIMP Activity 4a
      • GIMP Activity 4b
      • GIMP Activity 6b
      • GIMP Activity 6e/f
      • GIMP Final Project - Cereal-Box
      • GIMP Final Project - Magazine Cover >
        • HCS'16 Graphic Art & Design 110
      • GIMP Bonus Assignment
      • GIMP Marking Breakdown
      • Raster Graphics Explained
      • Old GIMP Activities >
        • GIMP Activity 2
        • GIMP Activity 6a
        • GIMP Activity 6c
        • GIMP Activity 6d
    • Excel
    • Audio / Video >
      • Videography
      • Sound (Audacity)
      • Video (One Minute PSA)
      • Make a Movie Trailer
      • Blender Video Editor - Test
    • Automotive >
      • Auto - Careers
      • Auto - Engines
      • Auto - 4-Stroke vs 2-Stroke
    • Coding - Teacher Start
    • Python (Coding) >
      • Python - CS 110 PD - July 2016
      • Python - CS 110 PD Part 2 (Projects)
      • Python - CS 110 PD Part 3 (GUI)
      • Install Python 3.5 + PyGame
    • Design (AutoCAD) >
      • Design Act. 1
      • Design Act. 2
      • Design Act. 3
      • Design Act. 4
      • Design Act. 5
      • Design Act. 5b and 5c
      • Design Act. 6
      • Design Act. 7
      • Design Act. 8
      • Design Act. 9
      • Design Act. 10
      • Design Act. 11
      • Design Act. 12
    • Design (Sketchup) >
      • Sketchup House Setup
    • Portable Apps >
      • Cam Studio
      • Virtual Dub
      • Scratch (and Zip File for Students)
      • TuxPaint (and Zip File for Students)
      • TuxTyping (and Zip File for Students)
      • Google Chrome
    • Project Management >
      • Intro to Project Mgmt.
      • Assignment for Project Management
    • Database >
      • Tasks Database
    • Final Projects and Exam Review >
      • Final Project - BBT 10 - 2015
      • Final Project - Digital Production 2015
      • Final Project - Media Studies 2015
      • Exam Review 2013
    • Cybersecurity
  • Art Units
    • Elements and Principles >
      • Elements of Art
      • Principles of Design
    • Photographic Composition
    • Visual Art 9
    • Graphic Art & Design 110 >
      • Colour Theory
      • Layout
      • Fonts and Type
    • Visual Art 110
    • Previous Box Projects - Visual Art 10
  • Other Units
    • Housing >
      • How to Design a House
    • Media Studies >
      • Media Studies Handouts
      • What is media? Why study media?
      • Film, Television and Video
      • Advertising, Marketing and You
      • Media and the Internet
      • Self-Study Project
    • Nutrition >
      • Recipes >
        • Black Bean Cake and Cupcake
  • Sports
    • Volleyball >
      • NMS Volleyball 2019
      • Volleyball Contact
      • (Old) Volleyball 2017
      • (Old) Volleyball Spring 2016
      • (Old) 2016 Tournament - MS Boys Volleyball
      • (Old) Volleyball Spring 2015
      • (Old) 2015 Tournament - MS Boys Volleyball
    • Soccer >
      • (Old) Soccer Fall 2015
    • Basketball
  • Blogs
    • Computer Science Blog
    • Personal Blog
  • Contact
  • About
    • About Mr. Rich
    • About Technology and Computer Science
  • Archives
    • Teaching Software >
      • Purchasing a Computer (notes) >
        • Purchasing a Computer
        • Computer Scenarios
        • Computer Presentation
        • PAC Test Instructions
        • PAC Peer Review
        • How to Submit Computer Comparisons
        • How to Submit Computer for Helen
      • Scratch 2 (Coding)
      • Scratch 1.4 (Programming)
      • ARCHIVED - GIMP (Raster Graphics)
      • ARCHIVED - Inkscape (Vector Graphics)
      • AutoCAD (2D Design)
      • Sketchup (3D Design) >
        • Google Sketchup (2011)
        • Google Sketchup (2012)
      • Excel vs Calc (Spreadsheet)
      • Cam Studio (Screen Capture Videos)
      • TuxPaint (for young kids)
      • TuxTyping (Typing Tutor)
    • Links >
      • Career Links in Fredericton
      • Job Hunting Tips
    • Presentations >
      • Scratch Workshop Oct 11, 2013
      • Scratch Workshop Sept 18, 2013
      • Math for French Immersion
    • Software That Is No More >
      • Setup (for an older version of Weebly) >
        • Setup - Day 1
        • How To Setup Your Weebly Pages
        • Marks (link to Canvas)
        • Web Portfolio
    • Previous Teaching >
      • Old Teacher's Logs >
        • Teacher's Log 2015-2016
        • Teacher's Log 2014-2015
        • Teaching Notes - Hartland 2014
        • BBT9 Teacher's Log (Apr-June2013)
        • BBT9 Teacher's Log (Jan - Apr 2013)
        • BBT9 2012
      • Sept2010-Jan2012 >
        • Old Home
        • Middle School >
          • Literacy
          • Social Studies 6
          • Social Studies 7 >
            • Online Test - Canada at Confederation
      • Jan2012-Nov2012 >
        • Book Blog >
          • Blog to Book
        • About Mr Rich
    • PD Sessions >
      • BBT9-10 Oct6 2016
      • BBT Teachers PD (Jan 2013)
      • Cyber-bullying (May 2013)

GIMP Activity #1

Picture
In this activity, we will learn how to:
  • crop an image to specific area
  • make duplicate layers (of the same image)
  • arrange and name layers
  • perform a filter on 5 of the layers
(Leave the first image/layer to show the original image)

Remember these Keyboard Shortcuts:
  • Ctrl-Z  = "Undo"
  • Ctrl-Y  = "Redo what you just Undid"

  • "+"     = Zoom In  (may need: "Shift +")
  • "-"      = Zoom Out
  • Ctrl-ScrollWheel = Zoom In/Out (hold down Ctrl and scroll)


amber.jpg
File Size: 271 kb
File Type: jpg
Download File


GIMP.org Downloads Page

GIMP as a "Portable App"
for Windows computers.
More about Portable Apps here.

Instructions

Picture
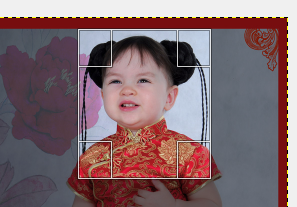
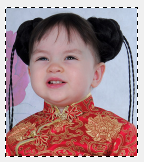
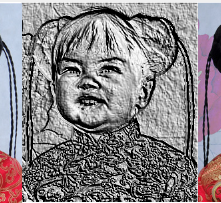
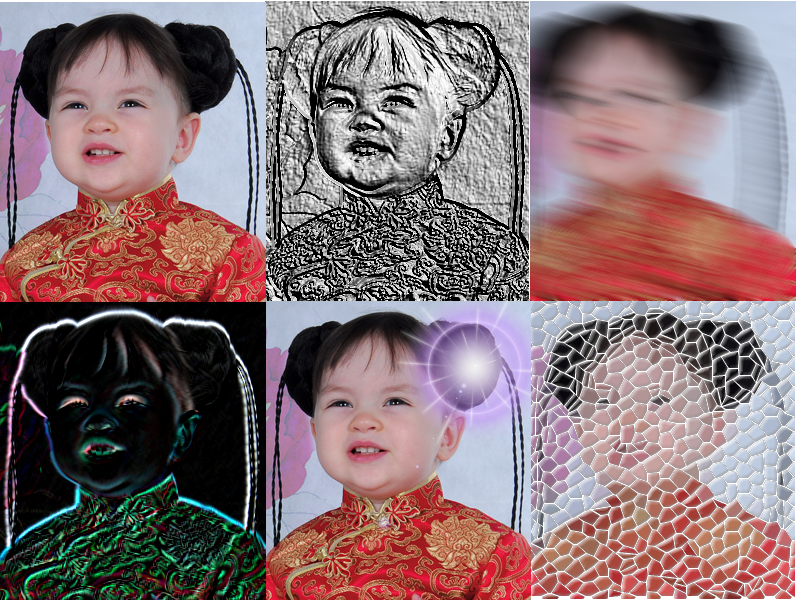
Find the photo called "Amber.jpg".

Open (or drag it into) GIMP.

Here are the steps we will use:
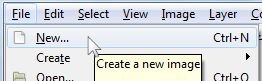
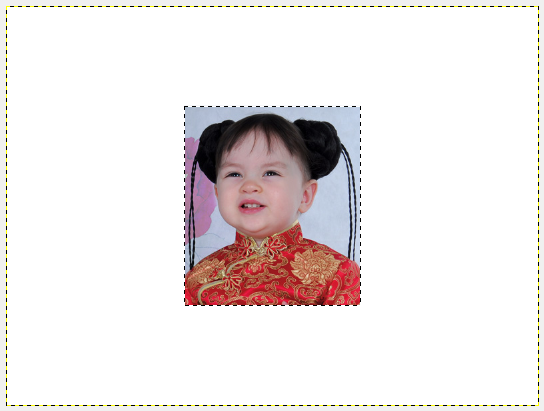
  1. We want a new file (File -> New) that is 800 x 600
    (800 pixels wide and 600 pixels high).

  2. Let's do the math to make 3 columns and 2 rows.
    800 / 3 = 266.66666 (so we set it to the 'floor':266)
    600 / 2 = 300

  3. Now, open the Amber photo

  4. Choose the Crop tool and drag a box around Amber's head.  Do *NOT* click Enter yet.
    In the "Tool Options" tab (below the buttons), 
    change the "Size" to 266 x 300
    (266 wide and 300 high)
    We want a "head and shoulders" photo, so
    click-and-drag in the middle of the crop window
    to get the photo we want.
    Now, press Enter (on the keyboard) to crop the photo.

  5. With Amber's cropped photo, choose:
    - Select -> All (or Ctrl-A)
    - Edit -> Copy (or Ctrl-C)

  6. Go back to your blank 800x600 file

  7. Now we want to Paste the cropped photo here:
    - Edit -> Paste (or Ctrl-V)

  8. Pasting creates a Floating Selection layer (Layers tab).  Click the "Create New Layer" button to make Amber's photo it's own layer.

  9. In the Layers tab, we want to Duplicate the layer so we have 6 layers of Amber.

    STOP!   Save your work!  
    File -> Save -> "activity-1.xcf"


  10. Use the Move button to move the top layer of Amber's photo to the top left corner of the canvas.
    Rename this layer "Original".

  11. Use the Move button to move:
    - the 2nd layer to the top middle
    - the 3rd layer to the top right
    - the 4th layer to the bottom left
    - the 5th layer to the bottom middle
    - the 6th layer to the bottom left

  12. We will apply Filters to layers 2-6 (+ rename layers).
    - Layer 2: Use Filter -> Distorts -> Emboss
    - Then rename Layer 2 to "Emboss"

  13. Layers 3-6, use whatever Filters you wish.
    Make sure that the filter makes an obvious change to Amber's photo.

  14. Save as activity-1.xcf
    - Be sure to upload this as a "File" on your Weebly site

  15. Export as JPG - activity-1.jpg
    - Be sure to upload this as a "Picture" on Weebly
      and click the first button to "Open larger image ..."


Picture
File -> New
Picture
New File 800x600
Picture
Picture
Crop Size 266x300
Picture
Mid-way through Cropping
Picture
Press Enter.
Picture
Paste Amber on 800x600
Create New Layer from Floating Selection


Picture
Move
Picture
Amber ready for Filters
Picture
Amber after Emboss
Picture
Activity 1 Complete
Picture
Layers tab (Duplicate)
Picture
Layers Renamed

Don't know how to submit your work?

Video: How to submit "Raster Graphics"


Copyright © Graham Rich 2010-2023.   Site made using Weebly.com.